

Installing plywood on ceilings is a practical and cost - effective way to enhance the aesthetics and functionality of a room. As a plywood supplier, I've witnessed firsthand the transformative power of plywood in ceiling installations. In this blog post, I'll guide you through the step - by - step process of installing plywood on ceilings, from preparation to the final touches.
Step 1: Planning and Measurement
Before you start any installation project, it's crucial to plan and measure your ceiling accurately. Begin by measuring the length and width of the ceiling to determine the amount of plywood you'll need. Make sure to account for any cutouts for light fixtures, vents, or other ceiling features.
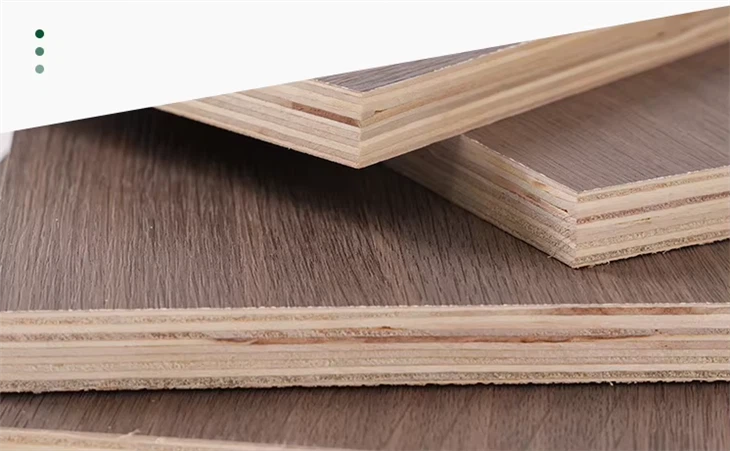
When selecting plywood for your ceiling, consider the type of room and its intended use. For general indoor applications, 14mm Oak Plywood is an excellent choice. It offers a beautiful natural wood grain and is strong enough to withstand normal wear and tear. If you're installing plywood in a bathroom or other high - moisture area, Waterproof Plywood for Outdoor or 18mm Waterproof Plywood is recommended to prevent water damage.
Step 2: Gather the Necessary Tools and Materials
Once you've planned and measured your ceiling, it's time to gather the tools and materials you'll need for the installation. Here's a list of essential items:
- Plywood sheets: Cut to the appropriate size based on your measurements.
- Measuring tape: To ensure accurate cuts and placement.
- Circular saw or jigsaw: For cutting the plywood to size.
- Safety goggles and gloves: To protect your eyes and hands during cutting and installation.
- Drill and screws: For attaching the plywood to the ceiling joists.
- Level: To ensure the plywood is installed straight.
- Staple gun or nails: Optional, for additional support or for attaching a vapor barrier.
- Vapor barrier (if needed): To prevent moisture from seeping into the ceiling.
Step 3: Prepare the Ceiling
Before installing the plywood, you need to prepare the ceiling surface. Start by removing any existing ceiling materials, such as drywall or popcorn ceiling. Make sure the ceiling joists are clean, dry, and free of any debris. If there are any damaged or rotten joists, replace them before proceeding with the installation.
If you're installing the plywood in a basement or other area with high humidity, it's a good idea to install a vapor barrier between the joists and the plywood. This will help prevent moisture from causing mold and mildew growth. Attach the vapor barrier to the joists using a staple gun or nails.
Step 4: Cut the Plywood
Using your measuring tape and circular saw or jigsaw, cut the plywood sheets to the appropriate size for your ceiling. Make sure to measure twice and cut once to avoid any mistakes. If you need to make any cutouts for light fixtures or vents, use a jigsaw to carefully cut out the holes.
When cutting the plywood, it's important to wear safety goggles and gloves to protect yourself from flying debris. Also, make sure to cut the plywood on a stable surface to prevent it from moving or vibrating during the cutting process.
Step 5: Install the Plywood
Once the plywood is cut to size, it's time to install it on the ceiling. Start by positioning the first sheet of plywood at one corner of the ceiling. Use a level to ensure the sheet is straight and level. Then, drill pilot holes through the plywood and into the ceiling joists. This will prevent the plywood from splitting when you insert the screws.
Next, insert the screws through the pilot holes and into the joists. Make sure to space the screws evenly along the edges and in the center of the plywood sheet. A good rule of thumb is to place the screws every 6 - 8 inches along the edges and every 12 inches in the center.
Continue installing the remaining plywood sheets, working your way across the ceiling. Make sure to butt the edges of the sheets together tightly to create a seamless appearance. If necessary, use a nail or staple gun to secure the edges of the sheets together.
Step 6: Finish the Installation
After all the plywood sheets are installed, it's time to finish the installation. Start by filling any screw holes or gaps between the sheets with wood filler. Allow the wood filler to dry completely, then sand the surface of the plywood smooth.
You can then choose to paint, stain, or leave the plywood natural, depending on your personal preference and the style of the room. If you're painting the plywood, make sure to use a primer first to ensure good adhesion.
Step 7: Clean Up
Once the installation is complete, clean up the work area. Remove any debris or leftover materials from the floor and ceiling. Dispose of the waste properly and store your tools in a safe place.
Tips and Tricks
- When cutting the plywood, use a sharp blade to ensure clean, straight cuts.
- If you're installing the plywood on a sloped ceiling, make sure to cut the sheets at the appropriate angle to match the slope.
- To prevent the plywood from warping or bowing, store it in a dry, flat place before installation.
- If you're installing the plywood in a large room, it may be helpful to have a helper to assist you with lifting and positioning the sheets.
Conclusion
Installing plywood on ceilings is a relatively straightforward process that can be completed by most DIYers with basic carpentry skills. By following the steps outlined in this blog post, you can achieve a professional - looking ceiling installation that will enhance the beauty and functionality of your home.
As a plywood supplier, I'm here to help you with all your plywood needs. Whether you're looking for 14mm Oak Plywood, Waterproof Plywood for Outdoor, or 18mm Waterproof Plywood, I can provide you with high - quality products at competitive prices.
If you're interested in purchasing plywood for your ceiling installation project, please feel free to contact me for more information and to discuss your specific requirements. I'm happy to assist you in finding the right plywood for your needs and to provide you with any support or guidance you may need during the installation process.

References
- "Plywood Installation Guide," Home Improvement Magazine.
- "Ceiling Installation Best Practices," Construction Manuals.