Working with timber in furniture making is a rewarding craft that combines artistry and functionality. As a timber supplier, I've witnessed firsthand the transformative power of this natural material in creating stunning pieces of furniture. In this blog post, I'll share some insights and tips on how to work with timber effectively in furniture making, drawing on my experience in the industry.
Selecting the Right Timber
The first step in any furniture-making project is selecting the right timber. Different types of timber have unique characteristics, such as color, grain pattern, hardness, and durability, which can significantly impact the final appearance and performance of your furniture. Here are some popular timber species commonly used in furniture making:
- Oak: Known for its strength, durability, and beautiful grain patterns, oak is a classic choice for furniture making. It comes in various colors, from light to dark, and can be stained or finished to achieve different looks.
- Maple: Maple is a hard, dense wood with a fine, even grain. It has a light color that can range from creamy white to pale yellow, making it a versatile option for both traditional and modern furniture designs.
- Walnut: Walnut is a highly prized wood for its rich, dark color and distinctive grain patterns. It is known for its strength, durability, and resistance to decay, making it ideal for high-quality furniture pieces.
- Cherry: Cherry is a soft, reddish-brown wood with a smooth, even grain. It has a warm, inviting appearance that ages beautifully over time, developing a rich patina. Cherry is often used in fine furniture making and is known for its elegance and sophistication.
When selecting timber, consider the following factors:
- Purpose: Think about the intended use of the furniture. Will it be a piece that will be used frequently, such as a dining table or a chair? Or will it be a decorative piece that will be displayed in a living room or a bedroom? Different timber species have different levels of durability, so choose a wood that is suitable for the intended purpose.
- Appearance: Consider the color, grain pattern, and texture of the timber. Choose a wood that complements the style and design of your furniture and fits your personal taste.
- Availability: Check the availability of the timber species you're interested in. Some woods may be more readily available than others, depending on your location and the time of year.
- Cost: Timber prices can vary significantly depending on the species, quality, and availability. Set a budget for your project and choose a wood that fits within your price range.
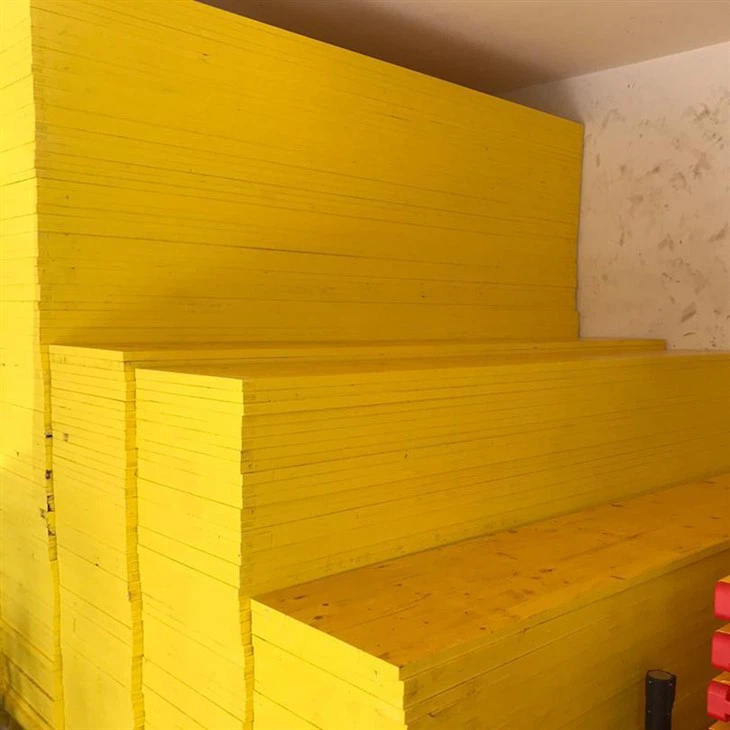
As a timber supplier, I offer a wide range of high-quality timber species, including H20 Timber Beam, 3 Ply Yellow Shuttering Panel, and Pine LVL Beam. I can help you select the right timber for your furniture-making project based on your specific requirements and preferences.
Preparing the Timber
Once you've selected the right timber, the next step is to prepare it for use in your furniture-making project. This involves several steps, including cutting, sanding, and finishing.
- Cutting: Use a sharp saw to cut the timber to the desired size and shape. Make sure to measure and mark the wood accurately before cutting to ensure a precise fit.
- Sanding: Sand the timber to smooth the surface and remove any rough edges or splinters. Start with a coarse-grit sandpaper and gradually work your way up to a finer-grit sandpaper for a smooth finish.
- Finishing: Apply a finish to the timber to protect it from moisture, stains, and scratches and to enhance its appearance. There are several types of finishes available, including stains, paints, varnishes, and oils. Choose a finish that is suitable for the type of timber you're using and the desired look of your furniture.
When preparing the timber, it's important to take your time and work carefully to ensure a high-quality finish. Use the right tools and techniques, and follow the manufacturer's instructions for any products you're using.
Joining the Timber
Joining the timber is a crucial step in furniture making, as it determines the strength and stability of the final piece. There are several types of joints that can be used in furniture making, including:
- Butt Joint: A butt joint is the simplest type of joint, where two pieces of timber are joined together by butting them end to end. This joint is not very strong on its own and is often reinforced with screws, nails, or glue.
- Dovetail Joint: A dovetail joint is a strong and decorative joint that is commonly used in drawer construction and box making. It consists of a series of interlocking pins and tails that fit together tightly, creating a secure bond.
- Mortise and Tenon Joint: A mortise and tenon joint is a strong and traditional joint that is commonly used in chair and table construction. It consists of a mortise (a hole) in one piece of timber and a tenon (a projection) on the other piece of timber that fits into the mortise.
- Biscuit Joint: A biscuit joint is a quick and easy way to join two pieces of timber together. It involves cutting a small slot in each piece of timber and inserting a biscuit (a small oval-shaped piece of wood) into the slots. The biscuits are then glued in place, creating a strong bond.
When joining the timber, it's important to choose the right type of joint for the application and to use the right tools and techniques to ensure a tight and secure fit. Make sure to measure and mark the wood accurately before cutting the joints, and use a sharp saw and chisel to create clean, precise cuts.

Assembling the Furniture
Once you've joined the timber, the next step is to assemble the furniture. This involves putting the individual pieces together to create the final piece. When assembling the furniture, it's important to follow the instructions carefully and to use the right tools and techniques.
- Use Clamps: Clamps are essential for holding the pieces of timber together while the glue dries. Make sure to use enough clamps to ensure a tight and secure fit, and to apply even pressure to the joints.
- Check for Squareness: Use a square to check the corners of the furniture for squareness. This will ensure that the furniture is straight and level and that the joints fit together properly.
- Adjust the Fit: If the pieces of timber don't fit together properly, you may need to make some adjustments. Use a saw or a chisel to trim the edges of the wood or to make the joints fit more tightly.
- Sand the Edges: Once the furniture is assembled, sand the edges and corners to smooth them out and remove any rough spots. This will give the furniture a professional finish.
Finishing the Furniture
The final step in furniture making is finishing the furniture. This involves applying a finish to the timber to protect it from moisture, stains, and scratches and to enhance its appearance. There are several types of finishes available, including stains, paints, varnishes, and oils. Choose a finish that is suitable for the type of timber you're using and the desired look of your furniture.
- Stains: Stains are used to color the timber and to enhance its natural grain pattern. They come in a variety of colors and finishes, including transparent, semi-transparent, and opaque.
- Paints: Paints are used to cover the timber and to give it a smooth, uniform finish. They come in a variety of colors and finishes, including gloss, semi-gloss, and matte.
- Varnishes: Varnishes are used to protect the timber from moisture, stains, and scratches and to give it a hard, durable finish. They come in a variety of finishes, including gloss, semi-gloss, and matte.
- Oils: Oils are used to penetrate the timber and to protect it from moisture and stains. They also enhance the natural beauty of the wood and give it a warm, inviting appearance.
When applying a finish to the furniture, it's important to follow the manufacturer's instructions carefully and to use the right tools and techniques. Make sure to apply the finish evenly and to allow it to dry completely between coats.
Conclusion
Working with timber in furniture making is a rewarding and challenging craft that requires patience, skill, and creativity. By selecting the right timber, preparing it properly, joining it correctly, assembling it carefully, and finishing it beautifully, you can create stunning pieces of furniture that will last for generations.
As a timber supplier, I'm committed to providing high-quality timber products and excellent customer service. If you're interested in working with timber in furniture making, I'd be happy to help you select the right timber for your project and to provide you with any advice or support you may need. Contact me today to discuss your furniture-making needs and to learn more about the timber products I offer.
References
- "The Complete Guide to Furniture Making" by Christian Becksvoort
- "Furniture Making for Beginners" by John Proctor
- "Timber: A Comprehensive Guide" by Richard Harris